Ecommerce product videos have come a long way from the days of the amateur unboxing video on YouTube. Consumers today are better informed than ever before, and this abundance of information has turned every purchase into a reconnaissance mission. Many people won’t even think about adding a product to their shopping cart until they’ve conducted enough research that they can, without a shred of doubt, be certain that they’re making the best possible purchase.
This means that it’s up to you to convince customers that your product is the best they can buy. That’s where product videos come in. Video can bring a product to life in the eyes of the consumer in a way that text and photography can’t. In fact, viewers retain 95% of a message when they watch it in a video, compared to 10% when reading it in text. And according to the website analytics company Kissmetrics, website visitors who view a product video are to 64-85% more likely on average to purchase that product. Read that sentence again. 85%.
Creating video can seem intimidating and out of reach. But nowadays, you don’t need to be a pro to shoot great content. As an ecommerce store owner, you have the power to create your own product videos. After all, online shoppers are becoming more influenced by normal people in front of the camera. Why? Because they don’t want flashy ads—they want authentic people educating them about how the product works.
So who can educate people about your product? You! You’re the expert in your niche.
With video, you can guide the customer through the experience of using a product and wax poetic about all its amazing features and nitty gritty details. A seller who has gone through the effort of showcasing their product in a video can serve as a signal to customers that this seller takes pride in the product and has done everything they can to make sure their customers are informed.
Let’s say a customer is in the market for a bicycle lock. He’s seen the photos, compared the specs between different models, and one lock in particular stands out. But he’s a little intimidated by the installation process because he’s never mounted this kind of lock to a bike before. How does he do it? Does it come with all the tools he needs? These unknowns are keeping him from hitting the “buy” button. This is a prime example of an opportunity where a product video could stop a customer’s hesitation dead in its tracks.
Or perhaps a customer needs a new backpack for hiking. She sees an ad for your company’s hiking backpacks and finds one that catches her eye. But will this backpack really do anything for her that a similar backpack from Target or Walmart won’t do? As an ecommerce store owner well-versed in the hiking backpack niche, you can use a product video to address the concerns specific to that audience and make a case for this backpack above others.
Remember: you’re the only one who’s going to establish a brand relationship with your niche market, and product videos are a fantastic way to do that.
In this guide we’ll show you:
- What type of content works best for product videos
- How to film and edit product videos
- How to place the video on your product page
- How to track the ROI of your product videos
How to create a product video that sells
When creating a product video, it’s important to keep in mind what customers want to get out of viewing it. To ensure that your product video is effective, make sure to always include the following actions:
Demonstrate how the product is used.
Pick it up, use it, abuse it. Try to demonstrate your product working in realistic conditions, solving the problems that customers are buying your products to solve. Selling a tough pair of work boots? Show how tough they are by subjecting them to the harsh conditions a customer might encounter on a job site—step on nails, drop a sledgehammer on the toe, cover them in oil, try to cut them with a knife. If they stand up to all of that punishment in a video, you’ll have done a lot to convince your customers that your boots are tough enough to protect their feet on the job. The more customer fears you can solve in your product video, the more likely you are to make the sale. There’s a lot of value in showing instead of telling. Take it apart, pull on it, flip it around, zoom in on details. That’s why they clicked play!
Talk about what you’re doing as you do it.
To keep people engaged, they need to hear your voice throughout the video. If you’re going to serve as the on-camera talent, it's also a good idea to introduce your beautiful face at the beginning of the video with the product in-hand to establish that a real human is guiding this product tour. As the video progresses, your audience will want to see the product close-up. At that point, you can just focus the camera on the product itself, but continue your explanation as a voiceover.
Mention (or show) how the product solves the customer’s problem.
Your video should focus on customer problems and how your product solves them. For example, if selling a camera bag, show all of the pockets on the bag, demonstrate their sizes, and explain what sorts of accessories can be stored in them. Even better, bring actual camera accessories and show the customer how well they fit, and how your bag keeps those expensive camera accessories better-secured and better-organized than competing bags.
Examples of quality product videos
Below, we’ve compiled a list of product videos that do a great job of demonstrating the features of their respective products, and why they should be chosen over competitors’ products.
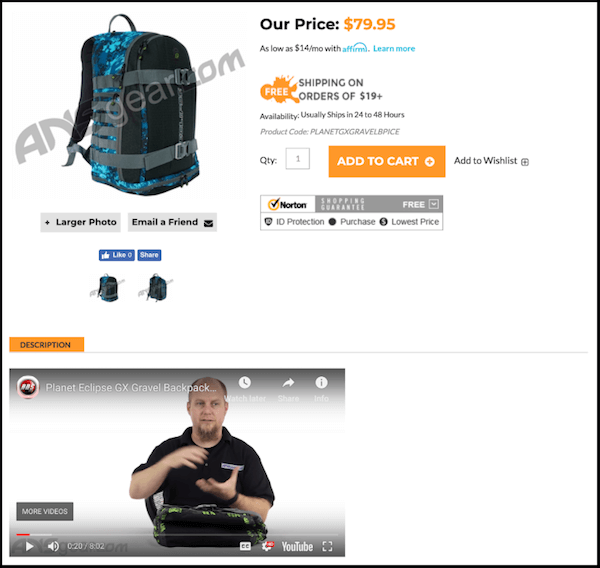
Example 1: Product walkthrough with niche-specific use case examples
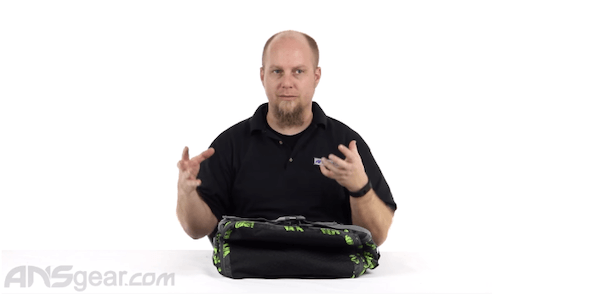
In this 8-minute video about paintball bags, the product expert comes across as authentic and knowledgeable as he explains all the use cases that this product solves for their specific audience. By showing the features of the bag and explaining the uses for each, he’s done a good job of helping the viewer understand the capabilities of the bag from a paintball-centric perspective.
Take note that this is a fairly no-frills video. Using a simple white backdrop, they keep the viewer’s attention entirely on the product. However, the video does not show any actual paintball accessories being placed into the bag, which is a bit of a shortcoming—some viewers might be wondering if a standard CO2 canister fits securely into a side pocket, or whether they can fit a dirty pair of shoes in the bottom pouch. A good rule of thumb is that people always prefer to see a product in actual use instead of hearing about how it can be used.
Watch the video here
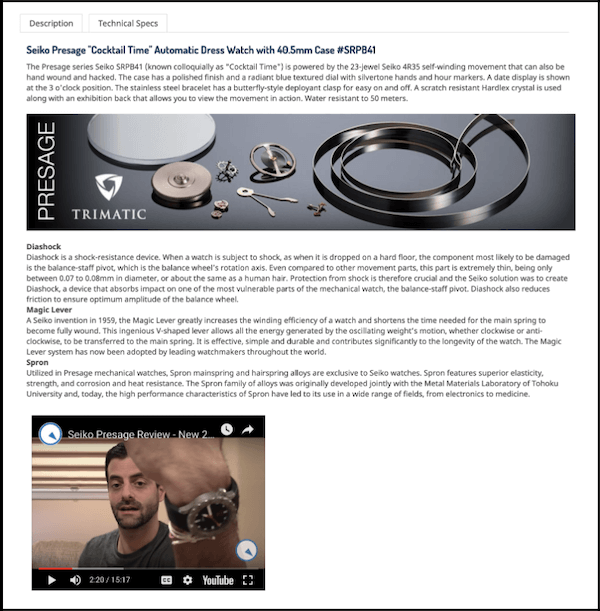
Example 2: Showing your expertise
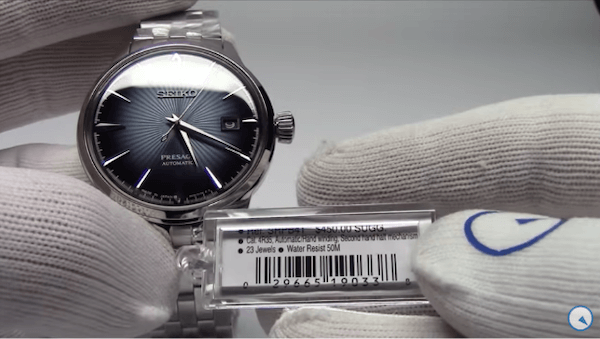
In this product demo video, Marc Frankel, founder of Long Island Watch, goes into extreme detail about this particular watch for 15 minutes, speaking about every single detail of the watch and its various color and style options. Frankel’s honest demeanor and enthusiasm for the product, paired with his obvious expertise and in-depth knowledge about the products he’s selling, give this video a great deal of authenticity as he is clearly speaking the language of the target niche. By “talking the talk” and displaying his expertise, Frankel establishes himself as an authority and boosts customer confidence in his opinions. You’re not getting that level of detail or care from an Amazon product page, and people want to know all about a high-dollar product before purchasing.
Watch the video here
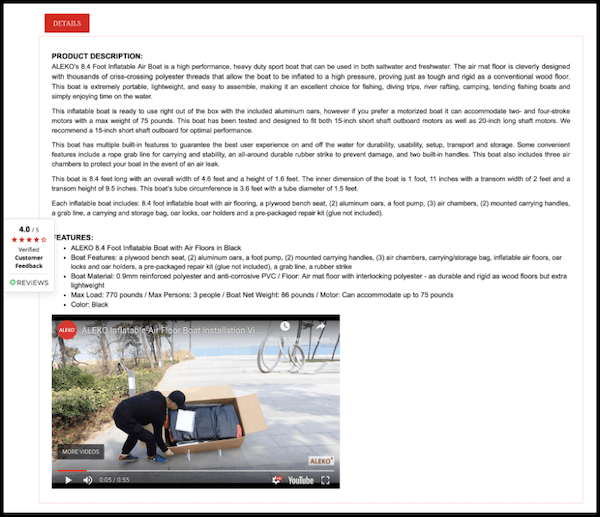
Example 3: Inflatable Boat - Unboxing
Unboxing videos can also add value, even without the aid of narration. These videos work especially well for luxury products, electronics, and anything with fancy custom packaging. In this video from Aleko Products, an expert unboxes and sets up an inflatable air floor fishing boat. Since inflating the boat takes a while, this video was edited down to show just the essential steps, giving the viewer all of the information they want without having to wait through any boring “dead air”—moments in your video in which nothing interesting is happening. Now the customer knows exactly what to expect when unboxing and inflating this boat. The addition of music, graphics, and transitions also make this unboxing video feel well-paced and professional.
Watch the video here
Example 4: Explanatory
If you think your product isn’t Instagram-worthy, don’t let that stop you. It could mean the internet isn’t already saturated with content similar to yours—and a lack of competing content could be a great opportunity for your product videos to stand out. Take this product for example: a gastrointestinal repair health supplement. Dr. Nick Zyrowski uses a simple whiteboard to explain the problem that the shopper is suffering from in detail, and how the product fits into solving that problem. This is a page straight out of Marketing 101—a product is solving a problem. Combine that messaging with the authority of an expert speaker like Dr. Zyrowski, and you will definitely have any customer’s attention.
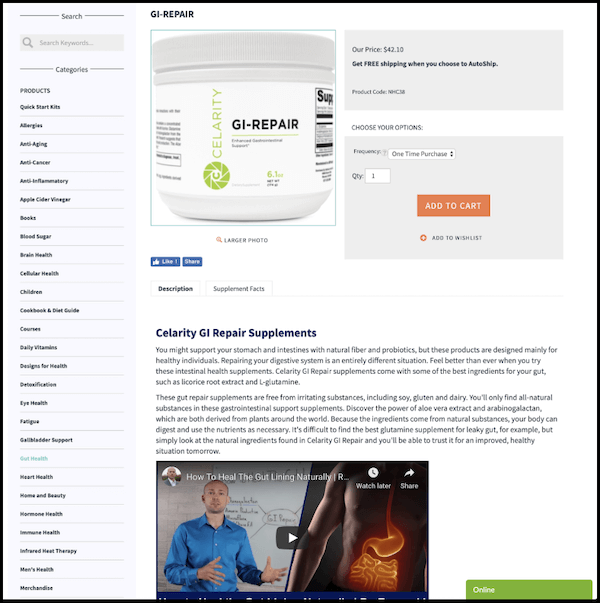
Watch the video here
Do your research and find your style
Ultimately, when it comes to product videos, you need to pick a style that works best for your product. But you don’t need to reinvent the wheel. Take the time to study all sorts of different product videos made by ecommerce owners in various industries. Write down the things you like about each video, as well as the things you don’t like.
If you find product video styles you like, try to recreate them. Some will work and some won’t, but that’s okay! Give yourself the freedom to experiment. You’ll end up putting your own spin on your videos anyway, but studying the work of others will help you nail down a style that fits you.
How to film professional-looking product videos on a budget
You’ve filmed videos before—after all, your kids' baseball games don't just film themselves. But you’re probably just beginning to dip your toes into filming videos for professional use, so let’s go over some of the basics. First up: the equipment.
Getting the right equipment
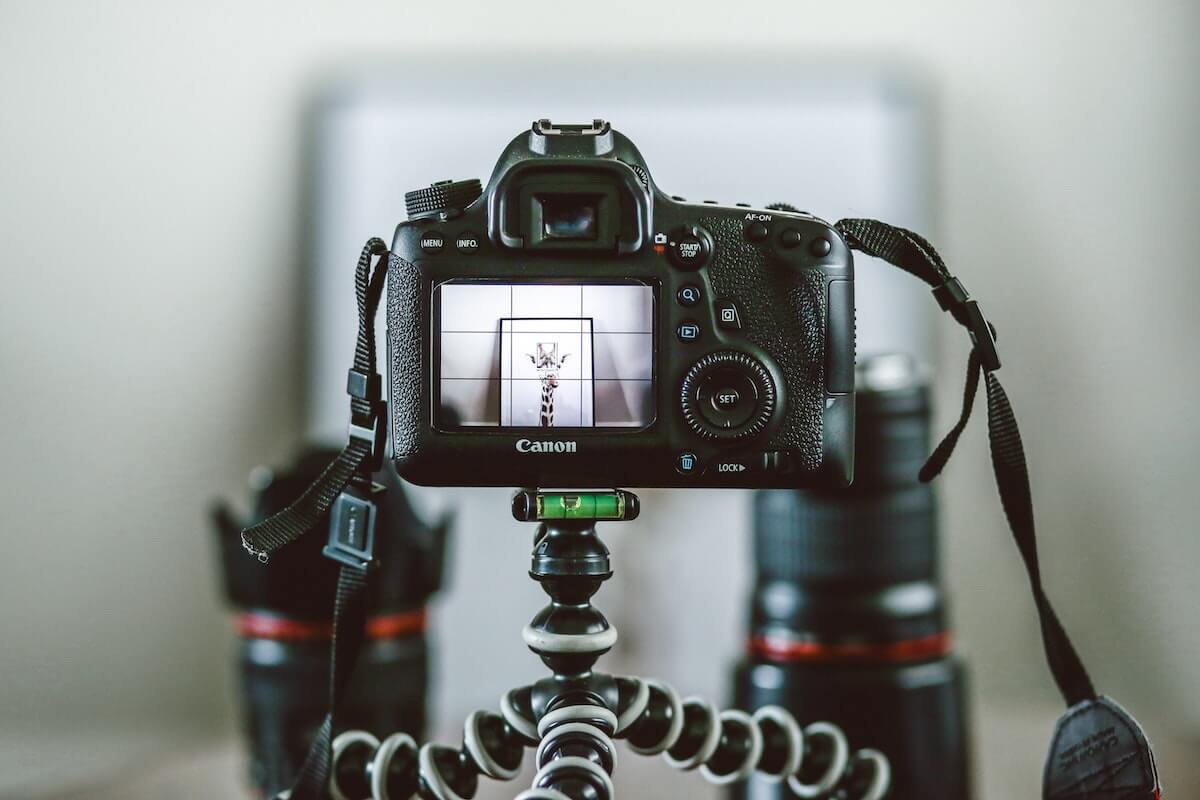
Camera
Makes sense to have a camera for filming video, right? First and foremost, figure out which type of camera you’re going to use—either a smartphone or some kind of standalone camera, such as a DSLR. The higher-end cameras may give you more control over the aesthetics of the video (for example, you can switch out a variety of higher-quality lenses on a DSLR), but for the purposes of product videos, your smartphone may do the job just fine. Film a few test videos on your smartphone and then play back that footage on a computer. Are you satisfied with the quality? If not, ask yourself if the investment in a higher-end camera is worth the return.
Tripod
No matter which type of camera you choose, you will need a tripod. Tripods provide the stabilization essential for video, which can be an unforgiving medium when it comes to motion. Every little movement in a camera will be “felt” by the viewer, so a tripod is key.
If you’re filming with a smartphone, make sure your tripod has a phone mount, which is an attachment that clamps to your smartphone securely and screws into a standard tripod head. The Ravelli APLT4 51" Light Weight Aluminum Tripod is an example of an inexpensive tripod that comes with a phone mount.
If you already own a standard camera tripod and don’t wish to purchase a separate tripod for your smartphone, that’s okay too—you could also buy a phone mount as a separate piece and attach it to any standard tripod. The Manfrotto MCLAMP universal smartphone clamp is a great example.
On the other hand, if you are filming using a regular camera (not a smartphone), you likely won’t need to worry about buying any additional tripod attachments, as nearly all cameras have threading on the bottom of the camera body that screws directly onto a tripod head.
Another thing to consider when selecting tripods is the maximum extendable height of the tripod. Most standard tripods have a maximum extendable height of between 40 and 60 inches. Before you purchase your tripod, make sure you have some sense of how and what you intend to film. Will you film the product only? Will you film a person addressing the camera? If so, will the person be sitting behind a desk or standing up? Will the tripod be placed on a tabletop or on the floor? You’ll need to answer these questions to figure out what kind of framing you want to achieve. Once you’ve made your decisions, measure the vertical height from the base (either the floor or tabletop surface) up to the point where your camera’s lens will be. That measurement will determine the size of the tripod you should use.
One more thing: if you know you’d like to be doing all of your filming on a tabletop surface, you might consider purchasing a more compact tripod to accommodate such close-range filming. Check out the GripTight GorillaPod Stand PRO, which reaches a maximum vertical height of only 12 inches. This tripod also has the added benefit of bendable legs, which can help achieve stability in more awkward filming positions.
Audio
If you have on-camera talent speaking in the video, you’ll probably want to hear them, right? Your camera or smartphone has a built-in microphone—though, truth be told, those microphones are not always great. You may want to consider using an external microphone that attaches to your camera or smartphone to enhance the quality of the audio. In terms of easy-to-use consumer microphones, your main options are shotgun microphones or lavalier microphones.
A shotgun microphone is a unidirectional microphone, meaning that it receives audio from a very concentrated source—which is perfect, because the person speaking in your product videos just so happens to be a very concentrated source. You can mount a shotgun microphone on top of your camera or smartphone. The Movo VXR10 is one example of an inexpensive shotgun microphone that plugs into the 3.5mm audio jack in any camera or smartphone.
A lavalier microphone is a small microphone that clips directly onto the speaker’s lapel, capturing audio as close to the source as possible. Check out the Rode smartLav+ if you’re in the market for a wired version of a lavalier microphone. Wireless versions like the Comica CVM-WM100 tend to be a little pricier, but they allow you more freedom of movement without having to worry about being restricted by the microphone wire.
If you plan on skipping the external microphone for now and relying on the microphone already built into your camera or smartphone, remember that the further away your camera is from the person speaking, the worse the audio quality is going to be. Bring your camera closer to your on-camera talent—your audio may depend on it.
Backdrop and lighting
Most professional photographers and videographers will tell you that lighting and backdrops are much more important than what model of camera you use. Spending $100 on a lighting rig and backdrop will do much more to improve your final product videos than spending an extra $100 on a fancier camera model—if your lighting is terrible, an expensive camera will just do a very good job of recording how terrible it is.
What should your “set” look like? For product videos, simplicity is best. Solid white backdrops are very trendy in product videos right now—and for good reason. They’re easy to light evenly and they eliminate any visual distractions for the viewer, keeping the focus entirely on you and the product. Consider picking up an all-in-one backdrop and lighting kit like this one by Fancierstudio that comes with three lights and light stands for a standard three-point lighting setup (complete with softboxes for each light to help create more diffused and even lighting). The kit also comes with white, green, and black backdrops, and even includes a backdrop stand. A simple (and affordable!) studio-in-a-box set like this one can help add a professional look to your product videos.
If you’re not quite committed enough yet to buy a lighting kit, you can get creative with the lighting you have on hand. Bring in some extra lamps to eliminate shadows. But mostly go with your eye: is the lighting flattering or unflattering for your on-camera talent and product?
And if you don’t have the space to set up a solid white backdrop, don’t worry—any simple location, such as your existing office or facilities, can work as a background for filming. Just keep in mind that you don’t want to film in front of a cluttered bookshelf or a messy desk or a pile of empty beer cans in the corner.
Setting up for the shoot
Plan for the shots you want
There’s a term in filmmaking called storyboarding, which refers to drawing sketches to help plan out the list of the shots you want to get before you film. It’s basically a way to visually organize all the things you want to see. For example, you may want to vary the types of camera angles in the video. You can do this by sketching out an establishing shot of the on-camera talent with the product, followed by the close-up shots of the product as needed. A storyboard doesn’t need to be complex, and you don’t need to be an artist. You can download blank storyboard templates online and doodle a basic outline. This way, you can make sure you get all the shots you want to show off your product.
Camera setup
Varying the types of shots can help create a sense of pacing in the video, which keeps your viewer engaged. Ever notice how some product videos include shots of the product from different angles? How exactly did they film those? Well, these shots were either achieved via a multi-camera setup or a single-camera setup.
A great example of a multi-camera setup is the backpack video by ANSGear you saw earlier. Here, they introduce the video with an establishing shot to create visual context by establishing the on-camera talent and the product.
Then when it comes time to get a closer look at the product itself, they cut to an overhead shot of the product. In this shot, you don’t see the speaker’s face or body (with the exception of his hands as he handles the product).
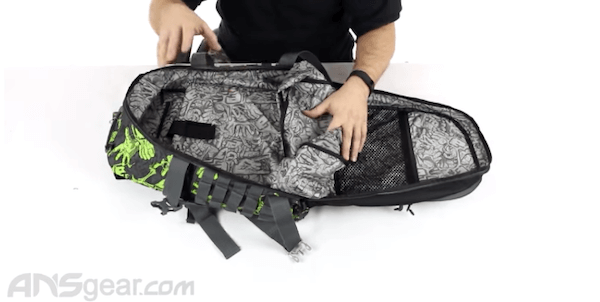
ProTip: You can achieve an overhead shot by simply extending a tripod above the table and tilting the tripod head straight down facing the product. It won’t be a perfect 90-degree angle facing downward, but for most product videos, it’ll be close enough. (Side note: if you do happen to be a stickler for a perfect 90-degree angle, you could try a more advanced technique by setting up the camera on a boom pole and attaching it to a sturdy stand, such as a C-stand. If this technique intrigues you, check out this article to learn more!)
The primary benefit of having a multi-camera set-up is that the on-camera talent can speak and use the product at the same time without having to worry about stopping to set up a different angle. Plus, you can easily cut between both camera angles when you edit the video later.
If you don’t have more than one camera to use for your product video, that’s okay too. You can also film using one camera at a time. A great example of the single-camera video setup is the video by Long Island Watch linked earlier in this guide. Here, you see that the on-camera talent addresses the camera directly in the beginning of the video, creating an establishing shot.

Then, he switches to a separate close-up shot of the products that continues for the remainder of the video. You only need one camera to achieve this, but you do need to set up and shoot each angle separately.
Test your equipment
Test all of your equipment before it’s time to film and make sure to do it at the filming location. Here are some things to check:
- Lighting: Eliminate any obvious shadows or glare coming off of any surfaces that might distract viewers. Another good rule of thumb: try not to point your camera directly at a window or a light. When you point your camera at a light source, it can cause the footage to look “blown out” by bright white light, while objects and people in front of the light become dark and shadowy.
- Audio: You already know you need to hear the on-camera talent speaking, but when testing out your equipment, you also want to keep an ear out for distracting background noise. Record a few clips using the microphone you plan on using (whether external or built-in) and—this is important—play back the clip so you can hear the audio after it’s recorded. Pay special attention to any background noise you may not have noticed while recording. One common example is road noise, especially if you’re filming near a busy street or highway. Are you struggling to hear the on-camera talent over the sound of traffic? That’s a good indication that you need to change locations. Also pay attention to any echoing. For example, if you’re filming in a big empty warehouse or a room with high ceilings, you’re going to hear significant echoing during video playback, which diminishes the overall production quality of the video. Consider finding a new location in this instance as well.
Filming Tips
Film in landscape, not vertical
If you’re filming on a smartphone, you may be tempted to film in vertical mode, but please resist the urge. Consider this the first cardinal rule of professional video.
Dress the part
Dress your on-camera talent in company branded clothing if possible to help reinforce the brand. It also helps subconsciously convey a sense of expertise and legitimacy to the viewer. This isn’t just any unboxing video—it’s an unboxing video by an official company person.
Always listen for background noise
Even if you’ve already tested the audio and decided you’ve selected the most acoustically perfect filming location ever, you still need to be hyper-aware of any background noise that may occur during filming. One common example is the sound of low-flying aircraft like planes or helicopters passing overhead, as microphones do pick up those sounds. Wait for loud aircraft to pass and then resume filming. Hold on—did someone just start a lawn mower outside? It’s unfortunate, but it happens. Again, wait for the noise to disappear. You’ll thank yourself later. It’s easy to forget about audio while you’re filming, but it’s a critical component of good video.
Take notes
If you plan on doing multiple takes (and you probably will), consider having a shot list on hand and keeping track of the number of takes with notes describing which were best. Did you end up doing 12 takes of a 5-minute long explanation? It might be a pain to remember which take was best when it comes time to edit the video. Also, try beginning each take with a visual aid like a piece of paper with the take number on it. That way, you can quickly skim through your clips when editing.
Double check the footage
This one’s important: while you’re still on set, play back the footage you shot before you call it a wrap. There’s nothing worse than having an area all set up and lit, the cameras perfectly positioned, the talent looking perfect, and then realizing much later on that you need to re-shoot something for one reason or another (bad audio, out-of-focus shot, memory card malfunction, etc.). It might seem tedious at the time, but your future self will thank you.
How to edit product videos
Choose the right video editing software for you
There is no shortage of free and low-cost video editing software out there. If you have a Mac, you already have a convenient, easy-to-use consumer editing software in iMovie. If you don’t have a Mac, or want to explore other options, consider these popular video editors:
- Hitfilm Express: A free version of a user-friendly software that can be upgraded to Hitfilm Pro if needed
- Lightworks: Another simple video editor that’s popular with the YouTube crowd and upgradable to a pro version
- Adobe Premiere: The, well, premiere video editing software for professionals, available via the subscription-based Adobe Creative Cloud Suite
There are a host of other video editors available. Try out a few and see which one has the best feel and usability for your needs. Keep in mind, any editing software that bills itself as a “pro” software (such as Adobe Premiere) will have a steep learning curve. You might want to start with some basic editors and advance to the pro stuff if you think you need it for more complex editing later.
Video editing tips
No matter which software you choose, there are a few tried-and-true best practices for editing product videos.
- Be succinct. Edit it down to the bare essentials. If you’re showing a process that can be sped up, or if some less-interesting parts can be clipped out, do it. This helps to create a sense of pacing that keeps the viewer engaged and more likely to finish the video.
- Add transitions between clips. Simple crossfades between clips can cover up your cuts and can help prevent the viewer from feeling jarred when you cut from one shot to the next. Also consider fading up from black at the beginning of the video and fading to black at the end of the video to give it a more polished feel.
- Add graphics. Add an image of your company’s logo (or a motion graphic, if available) at the beginning and/or end of the video. Some even keep a watermark of their logo in the bottom corner of the frame throughout the video. Including your company branding helps accomplish that all-important goal of producing professional-looking content while also reinforcing your brand. ProTip: If you only have a static image of your company logo (not a motion graphic), you can always add some type of motion to the image in any video editor—even if it’s just a simple zoom in or zoom out on the logo. Video is a motion-based medium, so adding motion to a static image makes it appear more dynamic.
Music
Music can be a great way to introduce a video. You can either add a short song sample at the beginning and have it fade out as you begin to speak, or have a music bed playing throughout the entire video.
But what kind of music should you use? For starters, you definitely can’t use copyrighted music without permission, like any music by popular recording artists. Still, some folks are tempted to go ahead and post videos containing copyrighted music anyway, thinking they probably won’t get caught. But the problem is: you will get caught. Thanks to the Digital Millennium Copyright Act of 1998 (DMCA), YouTube is obligated to remove the videos that contain copyrighted music.
So what music can you use? You have some options:
- Stock music: Most editing software comes with free stock music options, right there in the program. Find the “Music” or “Sounds” section (these tools are typically very aptly named). Listen to a few tracks and find one that works for your video.
- The YouTube Audio Library: Did you know YouTube has a library of free music and grants its users full permission to download and use in any video project? It’s true! YouTube makes their audio library available to everyone in an effort to help take the guesswork out of music selection for the average Joe.
- Royalty-free music: You can also search for royalty-free music online if you don’t like the options that come with your editing software or on YouTube. Some popular providers of royalty-free music are Epidemic Sound and Audio Jungle. With sites like these, you pay a one-time fee for a license to use the song in your online video. Prices for music licenses from these sites will vary based on the artist, but they’re usually relatively cheap. No matter which site you choose, you’ll want to read over their terms of use carefully to ensure that the provider grants you full rights to use the music in your online videos.
How much does a product video cost?
So just how much is a product video going to cost you? Well, that depends on how much you want to spend. You have complete control over the level of commitment you want to give, which has a direct effect on your budget. We’ll take a look at two approaches to budgeting for product video creation.
The bare bones approach
Let’s say you’ve decided you want to do quick-and-dirty product videos with a skeleton crew of just yourself as the writer, director, producer, and star. Assuming you only have the budget to film using your smartphone, plus some inexpensive versions of the essentials, here’s how you can create product videos on a modest budget:
- Smartphone: Free (assuming you already own one, which…you do)
- Tripod: $30
- Shotgun microphone: $40
- Lighting kit with backdrop: $140
- Editing software: Free (seriously—there are so many great free options out there)
Grand Total: $210.
You mean to tell me only $210 is standing between you and your product videos? Come on! You can totally do this on a shoestring budget!
The finer things approach
Maybe you want to invest in some reliable consumer video equipment. Congratulations on your new toys! Here's what you can expect to spend:
- Camera: $200-$500*
- Tripod: $30-$100
- Wireless lavalier microphone: $200
- Lighting kit with backdrop: $140
- Pro editing software (Adobe Premiere): $30/month
Grand Total: $700-$1,000
*Note: This price range is what you can expect from standard consumer models of camera, including GoPro Cameras and popular consumer DSLRs (like the Nikon D3500 and the Canon EOS Rebel T7).
As you can see, an investment in some reliable consumer filming equipment can cost you between $700-$1,000. Not too shabby, all things considered. Of course, that number could skyrocket if, for some reason, you feel the need to spring for even higher-end professional grade equipment—though that may be premature for someone just getting started with product videos.
The real cost: your time
When it comes to creating product videos, the monetary investment in equipment can be fairly minimal. But the real cost is your time, especially in the beginning. There is a bit of a learning curve, especially when it comes to editing. Try to block off a few hours (maybe even a day) of your time to produce your first product video.
If you’re spending too much of your time creating your own videos, you may find it worthwhile to hire outside help. But keep in mind that the price of hiring professionals or semi-professionals (think film students and wedding videographers) adds up very quickly. You could expect to pay between $1,500-$5,000 or more for freelancers to create a 1-2 minute professionally produced video for the web. Then again, if the video is for your flagship product, it may be worth the investment.
How to place the video on your product page
The best place for a product video is in the product description. You don’t want it buried in your photos as one of the last photo swatches—you want it to be front and center in the product description so that as users are learning more about your value propositions, they are presented with this opportunity to engage with a closer look at the product.
Uploading a video on Volusion
- Upload your video to YouTube, and copy the video link.
- In your admin, when editing a product, use the YouTube Video Management section to add the YouTube video link.
- Done!
That’s all it takes to showcase your awesome product video on your product page. Volusion’s best-in-class SEO will automatically add Schema markup to your video and make sure it’s fully indexable and search-friendly.
Tracking product video ROI
There are a few ways to track the ROI of your videos. Let’s start with the simplest: if you pull a report of how many sales you’ve had for this product monthly over the last 12 months, you can simply wait and see how that changes next month. For example, if you sold on average 100 units per month, and next month you sell 183 units, that’s an 83% increase. While this method is simple and straightforward, it can’t always give you all the information you need.
Next, let’s get one step fancier. If you have your analytics setup properly, you’ll be able to see all kinds of metrics about this particular product page, such as “Time on Page,” for example. With a video, you’re likely to see this figure increase—which is good! The more time the visitor spends on the page, the more likely they are to click “buy.” You can also take your analysis further by creating a “Funnel Visualization” in GA that shows the segment of users who visited this page and purchased. By doing this, you can see how this user segment increases conversion rate to sale after you add the video.
Lastly, for ultimate fanciness and the best possible data, you can create an A/B test to assess the exact conversion rate increase of your video. You can use an A/B testing tool such as Optimizely to setup a new test.
Let’s say you’re running a test on your very first product video. In that test, you’ll target this product page, and set it to insert the YouTube video into the product description for 50% of shoppers who view this page. Then, after a number of weeks or months, you’ll know with more certainty if the video was the true driver for the sales increase versus some other variables such as seasonality, ads, or other factors outside of this page itself.
This certainty comes with two trade-offs:
- Unless you have a ton of traffic to this page, and a ton of sales for this product, it can take time for the test to reach statistical significance.
- While the test is running, only 50% of your shoppers are seeing your awesome video, and therefore you’re only getting half the sales increase you were hoping for. If you notice early that your video page is drastically outperforming the non-video page, it might be time to throw testing to the wind and commit to a change.
So you need to decide: do you create the video quickly, post it now, and look at the results next month? Or do you nerd out on the analytics and know the fruits of your labor with more precision? It’s really up to you, but we recommend taking a bit more time to evaluate your efforts. Not only will it make your videos better over time, but it will also help you track your progress and stay motivated.
Make your directorial debut
We’re so proud to see you graduate (with honors!) from The Volusion Film School, and we hope you’ll thank us in your Academy Award speech one day. Until then, get out there and shoot the product videos that are going to drive results on your ecommerce stores. After all, 51% of marketing professionals worldwide name video as the type of content with the best ROI, and Marketers who use video grow revenue 49% faster than non-video users.
Plus, since Volusion now offers unlimited bandwidth, the more views the merrier—especially since it can boost your YouTube channel to attract even more viewers and create a whole new customer acquisition channel for your business. Honestly, you’re running out of excuses not to create product videos.
It’s true that creating video can be time consuming, so don’t be afraid to delegate. Many businesses outsource video production to freelance agencies. You could also tap an influencer to do an unboxing video for you through sites like Influenster, TapInfluence, Upfluence, Famebit, or Grapevine. Then you can post their videos to your product page.
While an influencer might not be the de facto expert on your product the same way you are, that’s a trade-off you may have to make if time or resources prevent you from creating your own content. But hey—sometimes you’ll find the right influencer who’s gonna be a great match for your product and bring the speed and style that can outweigh your niche expertise. The only way to know is to try. As Mark Twain said, “The secret to getting ahead is getting started.”
 from Volusion Ecommerce Blog | SMB Marketing, Design, & Strategy https://ift.tt/3a1d29l via IFTTT


No comments:
Post a Comment